The key to extraordinary Great Migration photos isn’t just luck; it’s mastering the ecological intelligence and operational trade-offs that most overlook.
- Success depends on predicting animal movement based on environmental cues, not just following the crowds.
- Every choice, from your vehicle to your clothing, has a direct impact on your photographic opportunities and ethical footprint.
Recommendation: Plan for flexibility with mobile camps, understand the nuances of light and gear, and always prioritize the wildlife’s well-being over the perfect shot.
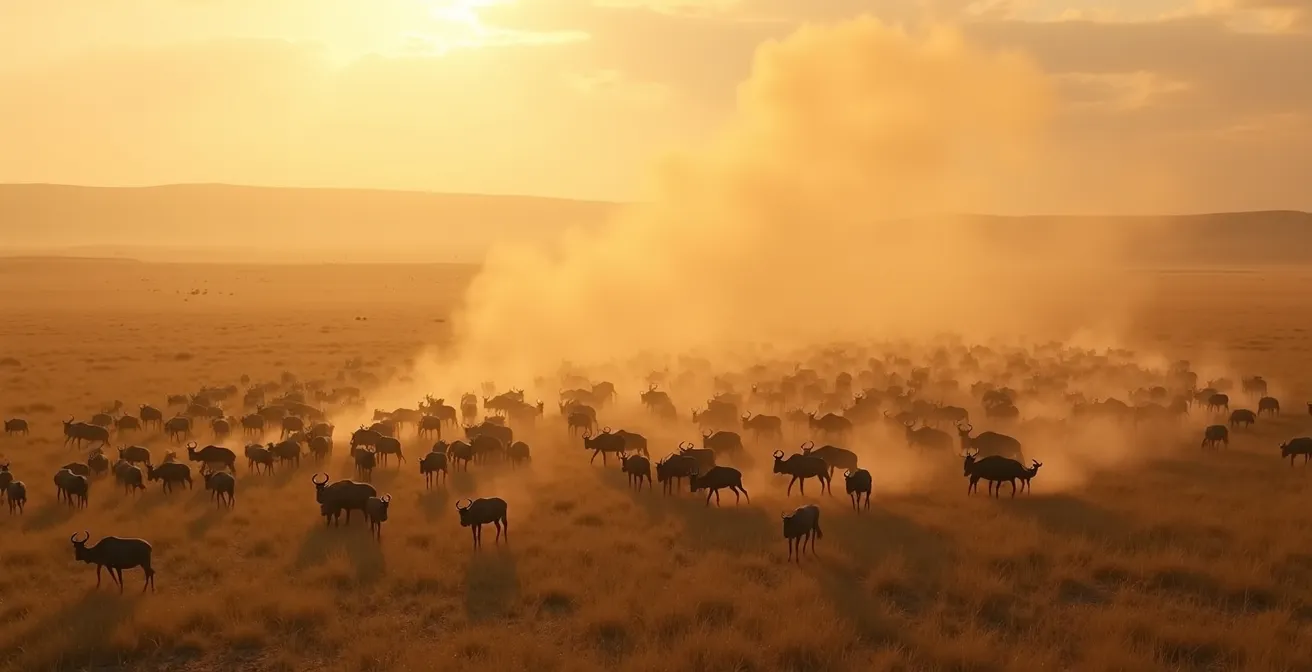
The vision is etched in the mind of every wildlife photographer: a million wildebeest thundering across the Mara River, dust and determination hanging in the golden light. You’ve seen the photos, you’ve read the articles. The common advice echoes across the internet—pack a long lens, wear khaki, and book your trip between June and October. But I’ve been out on these plains longer than I can remember, and I can tell you this: that advice will get you a safari, but it won’t get you the shot of a lifetime. Many return with photos that feel… familiar. Standard. They were in the right place, but at the wrong moment, with the wrong perspective.
The truth is, the Great Migration is not a single, predictable event. It’s a chaotic, year-long pulse of life driven by rainfall, grass, and primal instinct. To truly capture its soul, you have to stop thinking like a tourist and start thinking like a predator. It’s not about what gear you have, but how you anticipate the herd’s next move. It’s not just about avoiding bright colors, but understanding the specific threats that a simple blue shirt can attract. The real art of safari photography lies in the unseen variables, the subtle trade-offs, and the deep respect for the ecosystem you’re a guest in.
This guide is built on that field experience. We won’t just cover the ‘what’; we will dive deep into the ‘why’ and the ‘how’. We’ll explore the reasons you might miss the action even in high season, the critical packing decisions beyond just weight limits, and the ethical lines that separate a photographer from a conservationist. Prepare to go beyond the basics and learn the operational secrets to a truly great migration photography safari.
text
In this guide, we will break down the essential strategies and field-tested knowledge you need to transform your approach to wildlife photography in Tanzania. The following sections are designed to give you a true ranger’s perspective on planning and executing an unforgettable safari.
Summary: A Field Guide to Capturing the Great Migration
- Why You Might Miss the Migration Even in the Right Season?
- How to Pack for a Safari Where Weight Limits Are Strict?
- Open-Sided vs Closed 4×4:Emerging Trends in 2024: The 5 Shifts That Will Redefine Consumer Behavior
- The Clothing Mistake That Attracts Tsetse Flies
- When to Wake Up: Why the 5 AM Drive Is Non-Negotiable?
- When to Swatch: The Time of Day That Reveals the True Color
- Wild Safari vs Captive Encounter: Which Experience Truly Supports Survival?
- Protecting Endangered Fauna and Flora: How to Spot Ethical Wildlife Tours That Help Conservation?
Why You Might Miss the Migration Even in the Right Season?
The biggest misconception about the Great Migration is that it’s a predictable march from Point A to Point B. Travelers book their trips a year in advance for a specific week in August, expecting guaranteed river crossings. But the wildebeest don’t check calendars; they follow the rain. An unseasonal downpour or a localized drought can completely alter their route, holding them back for weeks or causing them to scatter across the plains. This isn’t a rare occurrence; it’s the fundamental nature of the ecosystem. The migration is a fluid, dynamic event, not a scheduled parade.
For example, in 2014, unexpected heavy rains in the southern Serengeti completely upended the normal schedule. Much of the herd, which should have been moving north, remained in the south well into July. Photographers who had booked fixed lodges in the Western Corridor found themselves in the right place, but at the wrong time. This illustrates the critical importance of ecological intelligence—understanding that weather patterns are the true directors of this drama. Recent migration patterns show that approximately half the herd might remain in Tanzania even during the traditional Kenyan peak season of August and September.
To counter this unpredictability, flexibility is your greatest asset. Instead of booking a single, static lodge, the smart move is to use mobile camps. These camps relocate throughout the year, following the actual, real-time movements of the herd. This strategy, combined with allocating a longer safari duration of at least 7-10 days, dramatically increases your chances of being in the heart of the action. It’s an operational trade-off: you sacrifice the permanence of a lodge for the immense advantage of mobility.
Ultimately, a successful encounter is about planning for variance, not for a fixed point on a map. A good guide will use their experience to anticipate behavior, not just chase radio calls from other vehicles.
How to Pack for a Safari Where Weight Limits Are Strict?
Every photographer’s nightmare on a fly-in safari is the moment of truth at the luggage scale. The small bush planes that connect the remote airstrips of the Serengeti have strict weight limits for a reason—safety. You’re not flying on a commercial jet. These aircraft are sensitive to every kilogram. Typically, bush flights typically restrict luggage to 20 kg (44 lbs) per person, and it must be in a soft-sided duffel bag, not a hard-shell suitcase, to fit in the plane’s small hold.
This presents a serious challenge for photographers carrying heavy lenses, multiple camera bodies, and support gear. It forces you to make critical operational trade-offs. You simply cannot bring everything. The key is not to just pack less, but to pack smarter. Consider a photographer’s vest, which can move 5-8 kg of heavy items like lenses and batteries from your luggage onto your person for the flight. It’s a game-changer. Another strategy is to rethink your lens selection. Do you really need the f/2.8 trinity? An f/4 lens kit is significantly lighter and often sufficient for the bright African sun. A high-quality teleconverter can give you the reach of an extra prime lens without the weight.
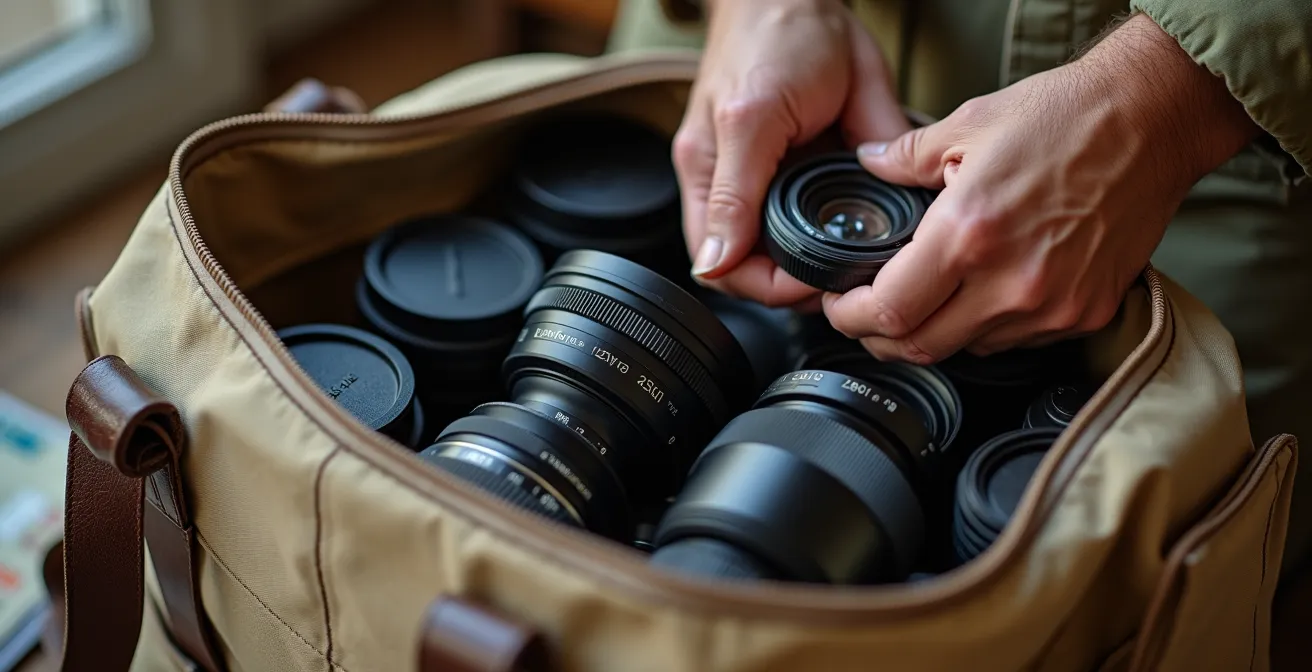
The table below breaks down some of these strategies, highlighting the weight you can save versus the compromises you might make. This is about making conscious decisions before you ever leave home, ensuring your most crucial gear makes the cut without sacrificing a shot on the ground.
This meticulous planning is part of the craft. A well-organized, weight-conscious kit means less stress during travel and more focus on what you came for: the photography.
| Strategy | Weight Savings | Best For | Trade-offs |
|---|---|---|---|
| F/4 Trinity Kit | 3-4 kg lighter than f/2.8 | Versatility seekers | Less low-light capability |
| Prime + Teleconverter | 2 kg savings per extra lens avoided | Reach specialists | Slight image quality loss |
| Photographer’s Vest | 5-8 kg moved from luggage | Heavy gear users | Physical comfort during flights |
Remember, the goal is to be nimble. On safari, weight is the enemy of opportunity. Pack light, pack smart, and keep your most essential tools within reach.
Open-Sided vs Closed 4×4:Emerging Trends in 2024: The 5 Shifts That Will Redefine Consumer Behavior
The vehicle you’re in is more than just transport; it’s your mobile hide, your camera platform, and your window to the wild. The choice between an open-sided 4×4 and a traditional closed vehicle with a pop-up roof is one of the most significant operational trade-offs you’ll make. There is no single “best” option; the right choice depends entirely on your photographic priorities and the conditions you expect to face. Don’t let anyone tell you one is universally better.
An open-sided vehicle offers unparalleled 360-degree views and the flexibility to shoot from extremely low angles, almost at ground level. This is invaluable for creating intimate portraits and capturing behavior without the barrier of a window frame. However, this openness comes at a cost: you are completely exposed to dust, wind, rain, and the sun. Your gear is, too. In the dry, dusty months, this can be a major issue for sensitive electronics.
A closed vehicle with a large roof hatch provides a more stable platform. You can mount a heavy lens on a beanbag on the roof for rock-solid support, which is critical for long-telephoto work. It also offers complete protection from the elements, a non-negotiable advantage during the wet season or in the face of a sudden downpour. Some specialist photographic vehicles even offer the best of both worlds, with drop-down side panels and rotating seats. As top-tier operators like Natural Habitat Adventures note, the number of guests per vehicle is just as important. They emphasize this point in their guide:
We split our group into separate top-of-the-line 4×4 safari vehicles, so no one is stuck in a middle seat. With just six guests per vehicle, each traveler gets an open side view with plenty of room.
– Natural Habitat Adventures, Tanzania Migration Safari Guide
This focus on space is crucial. A crowded vehicle, open or closed, is a photographer’s worst enemy. The table below details the specific advantages of each primary vehicle type.
| Vehicle Type | Photography Advantages | Environmental Protection | Best Use Cases |
|---|---|---|---|
| Open-sided 4×4 | 360° unobstructed views, quick repositioning, low-angle shots | Minimal dust/rain protection | Birds in flight, wide landscapes, dry season |
| Closed with roof hatch | Stable platform for heavy lenses, beanbag support on roof | Full equipment protection from elements | Long telephoto work, river crossings, wet season |
| Photographic Specialist | Drop-down panels, rotating seats, custom camera mounts | Adaptable protection levels | Professional photographers, extended shoots |
Ultimately, discuss this with your safari outfitter. A good operator will understand your photographic goals and match you with the right vehicle and guide for the job.
The Clothing Mistake That Attracts Tsetse Flies
You’ve heard it a thousand times: wear neutral colors on safari. Khaki, beige, olive green. But this advice is often given without the most critical piece of context: the tsetse fly. This isn’t just about blending in with the environment. It’s a serious matter of comfort and health. Wearing the wrong colors, specifically blue and black, is like sending a written invitation to every tsetse fly in the territory. These flies are not like mosquitos; their bite is painful and can penetrate through light fabrics.
Certain areas, like the woodlands of Tarangire National Park and the Western Serengeti, are known for higher concentrations of tsetse flies. I’ve seen photographers have their drives ruined because they overlooked this simple rule. Field experience from a visit to Tarangire underscores the point: photographers who wore the right colors and used specific repellents fared much better. Those who pre-treated their clothing with Permethrin and used a DEET-based cream on exposed skin reported significantly fewer bites than those who didn’t. This isn’t just a casual tip; it’s a proven protocol for defense.
Your clothing is your first line of defense. Choose tightly-woven fabrics like canvas or ripstop that are physically harder for the fly’s proboscis to penetrate. This is a practical application of ecological intelligence—knowing the specific threats of a given environment and preparing accordingly. It’s about more than just aesthetics; it’s about staying focused on your photography instead of swatting at painful insects. An effective defense requires a multi-layered approach, from fabric choice to chemical treatment.
Your Action Plan: The Tsetse Fly Defense Protocol
- Choose tightly-woven canvas or ripstop fabrics that are harder for flies to penetrate.
- Pre-treat all safari clothing with Permethrin spray 24-48 hours before travel.
- Pack neutral colors (khaki, beige, olive, grey) and strictly avoid blue, black, and very bright colors.
- Apply a DEET-based repellent, like Ultrathon, to exposed skin, paying special attention to ankles and wrists.
- Map your daily clothing strategy based on the ecosystem; double down on protection for woodland drives.
Don’t let a preventable mistake compromise your trip. Respect the local environment, understand its challenges, and pack to protect yourself effectively.
When to Wake Up: Why the 5 AM Drive Is Non-Negotiable?
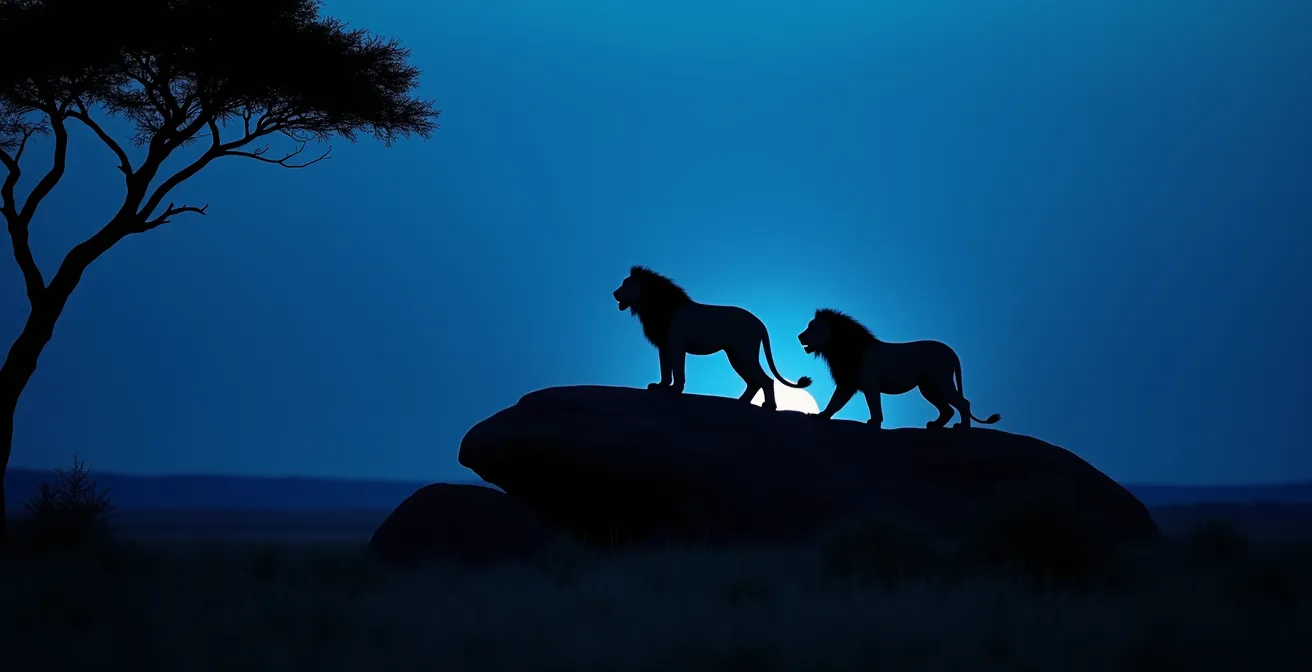
That 4:30 AM wake-up call might feel brutal, but out here, the day is won or lost before the sun even clears the horizon. The single biggest mistake a photographer can make is choosing a little extra sleep over the pre-dawn game drive. The hours between dawn and mid-morning are when the wild is most alive. This is the “golden hour” and the “blue hour,” the time of peak predator activity. Lions, leopards, and cheetahs are most active in the cool air of the morning, hunting before the heat of the day sets in.
The light during these early hours is magical. It’s what we call “light discipline”—understanding how to use the different qualities of light to create mood and drama. As the Tanzania Wild Camps Photography Guide eloquently puts it:
The golden hour at dawn and dusk enhances colors and creates stunning silhouettes. Early morning light creates dramatic shadows; late afternoon light softens the plains’ golden hues.
– Tanzania Wild Camps Photography Guide, Wildlife Photography Tips for Your Tanzania Safari Adventure
This isn’t just an aesthetic preference; it’s a biological reality. The data is clear: animal activity data shows that by 10 AM, the action is largely over. Most animals seek shade to rest and conserve energy, and the light becomes harsh and flat, bleaching out colors and creating unflattering shadows. By staying at the lodge for a leisurely breakfast, you are actively choosing to miss the best photographic opportunities of the day. The 5 AM drive is non-negotiable because the wildlife and the light operate on their own schedule, not ours.
It’s a simple equation: the earlier you are out, the greater your chances of witnessing and capturing something truly extraordinary. Coffee can wait; the hunt will not.
When to Swatch: The Time of Day That Reveals the True Color
In the world of art or fashion, “swatching” is about testing a color. For a safari photographer, the concept is the same, but our palette is the light itself. The “true color” of the Serengeti landscape changes dramatically throughout the day, and mastering your camera’s response to these shifts is a core tenet of light discipline. Auto white balance can be easily fooled by the intense and varied light, leading to images with an unnatural blue or orange cast. To capture the authentic colors of a scene, you need to understand how the temperature of light works.
Light temperature is measured in Kelvin (K). The cool, ethereal light of the pre-dawn “blue hour” can be over 10,000K, perfect for moody silhouettes. A few minutes later, the warm, directional light of the “golden hour” drops to around 3,500K, ideal for rich portraits and action shots. By midday, the light is harsh and blue-tinted, often exceeding 6,500K. Ignoring these shifts is a recipe for inconsistent and poorly colored photos. You must learn to “swatch” the light and adjust your camera’s white balance accordingly, either manually or with presets.
A professional approach involves creating a custom white balance preset at the start of each game drive. You can do this by taking a reference shot of an 18% grey card under the current lighting conditions. This gives your camera a neutral baseline, ensuring that the warm tones of sunrise look warm, and the cool tones of midday look neutral, not overly blue. During the harsh midday sun, using a circular polarizer is also essential. It acts like sunglasses for your lens, cutting through atmospheric haze and glare, which dramatically boosts color saturation and reveals the true, rich colors of the landscape and its inhabitants.
The table below provides a practical guide to how the light changes and what subjects it’s best suited for.
| Time of Day | Kelvin Temperature | Light Quality | Best Photography Subjects |
|---|---|---|---|
| Blue Hour (5-6 AM) | 10,000K+ | Cool, atmospheric | Silhouettes, moody landscapes |
| Golden Hour (6-8 AM) | 3,500K | Warm, directional | Portraits, action shots |
| Midday (10 AM-3 PM) | 6,500K+ | Harsh, blue-tinted | High-key shots, polarizer work |
| Golden Hour (4-6 PM) | 3,500K | Warm, soft | Herd movements, landscapes |
By actively managing your white balance instead of letting the camera guess, you take creative control and ensure your final images faithfully represent the breathtaking beauty you witnessed.
Wild Safari vs Captive Encounter: Which Experience Truly Supports Survival?
The question often arises, especially for those with limited time or budgets: why not just visit a sanctuary or a park with captive animals? The images can be stunning, and the encounters are guaranteed. But this choice goes to the very heart of what conservation means. A photograph of a lion in a cage and a photograph of a lion on a kill in its natural territory tell two completely different stories. Only one of them truly supports the animal’s long-term survival. The ethical core of wildlife photography is to do no harm, and to contribute, where possible, to the preservation of the species.
A true wild safari is an investment in the entire ecosystem. Your conservation footprint is immensely positive. Reputable safari operations in Tanzania are built on a high-value, low-impact tourism model. The substantial fees you pay for park entry, concessions, and lodging directly fund the protection of vast, unfenced landscapes. This revenue is the lifeblood of conservation efforts. It pays the salaries of anti-poaching rangers who patrol the 30,000 square kilometer Serengeti-Mara ecosystem. It funds community outreach and development programs, creating a local economic incentive to protect wildlife rather than exploit it. It supports the very habitat these animals need to survive.
In contrast, the conservation benefit of many captive animal facilities is questionable at best. While some are legitimate rescue and rehabilitation centers, many others exist purely for tourist entertainment, with little to no genuine contribution to wild populations. A photo from a wild safari shows an animal thriving in its environment, a testament to a healthy, protected ecosystem. That image carries a powerful conservation message. A portrait of a captive animal, no matter how beautiful, often represents a conservation failure—an individual removed from its role in the wild. The experience of searching for and respectfully observing an animal in its own world is infinitely more rewarding and impactful.
Case Study: The Conservation Impact of Photographic Safaris
The high costs associated with photographic safaris in premier Tanzanian parks are a direct investment in conservation. As detailed by conservation-focused operators like Asilia Africa, revenue from tourism is what enables the protection of these massive, unfenced ecosystems. This funding model has proven essential for maintaining ranger patrols, monitoring wildlife health, and ensuring the long-term viability of species populations across the entire Serengeti, demonstrating a clear link between ethical tourism and species survival.
When you choose a reputable wild safari, you are not just an observer; you become an active participant in the preservation of one of the planet’s last great wildernesses.
Key takeaways
- The Great Migration’s timing is driven by unpredictable rainfall, making flexibility with mobile camps more effective than fixed lodges.
- Smart packing is a game of trade-offs; prioritize versatile gear and use strategies like photographer’s vests to meet strict bush flight weight limits.
- The most powerful photos and ethical encounters happen when you prioritize the wildlife’s well-being, which directly funds the conservation of their habitat.
Protecting Endangered Fauna and Flora: How to Spot Ethical Wildlife Tours That Help Conservation?
Choosing an ethical tour operator is the single most important decision you will make. A responsible company is a partner in conservation, while an irresponsible one can actively harm the wildlife you’ve come to see. The difference lies in a deep, ingrained respect for the animals and their environment. It’s about understanding that your presence has an impact, and taking every possible step to minimize it. The goal is observation, not interference. But how can you, as a client, tell the difference on the ground?
The behavior of your guide is the clearest indicator. An ethical guide’s primary concern is always the animal’s welfare, not getting you the “perfect shot” at any cost. They are experts in animal behavior and can read subtle stress signals—a flick of the ear, a stiffening of the posture. When they see these signs, they will back the vehicle away, giving the animal space. As the Asilia Africa conservation guidelines state, this principle is absolute:
An ethical guide will never crowd an animal or cut off its path for a better photo. They understand animal stress signals and will sacrifice a ‘perfect shot’ for the animal’s well-being.
– Asilia Africa Conservation Guidelines, Guide to the Great Migration in Tanzania
You can actively assess your operator by observing their practices. Do they maintain a respectful distance, typically at least 25 meters from predators? Do they limit the time spent at a sighting to avoid cumulative stress, especially if other vehicles are waiting? Do they adhere to strict off-road driving policies, which are in place to protect fragile grasslands? A guide who races to a sighting, cuts off an animal’s path, or nudges closer and closer for a better angle is not working ethically. Your choice of operator is your vote. By supporting companies with strong conservation ethics, you help ensure these ecosystems remain wild and healthy for generations to come.
Here are key things to watch for in your guide’s vehicle positioning:
- Respectful Distances: Consistently maintaining a safe and respectful distance from all wildlife.
- Never Blocking: Avoiding positioning the vehicle in a way that blocks an animal’s intended path or escape route.
- Recognizing Stress: Watching for signs of agitation or discomfort and backing away immediately if they appear.
- Limiting Time: Not overstaying at a sighting, especially for sensitive species or mothers with young.
- Off-Road Discipline: Strictly following park rules regarding on- and off-road driving to prevent habitat damage.
Your journey into the wild is a privilege. Plan it with an operator who treats it as such, ensuring your photography contributes to, rather than detracts from, the magnificent animals you seek to capture.
Frequently Asked Questions about Tanzania Wildlife Adventure: How to Plan a Great Migration Safari for Best Photography Results?
How can I identify a legitimate wildlife sanctuary versus an exploitative one?
Look for release programs, prohibition of direct contact with animals, transparent funding sources, and accreditation from recognized conservation organizations.
What makes wild safari photos more impactful for conservation?
Images showing animals in their natural habitat with environmental context tell powerful conservation stories that captive portraits cannot match.
How do photography fees contribute to ecosystem protection?
Park entry fees and conservation levies from safari operations fund ranger salaries, wildlife monitoring, and community development projects.