
The key to a profitable renovation isn’t a bigger budget; it’s mastering the operational systems that prevent cost overruns and value erosion.
- Budget “creep” is caused by a lack of decision discipline, not just unexpected problems.
- Project delays are a direct result of poor trade sequencing, creating costly operational drag.
Recommendation: Shift your focus from design alone to implementing rigorous systems for budget control, contractor scheduling, and material selection to protect your investment.
Every homeowner embarking on a major renovation shares the same two-part dream: to create a beautiful, comfortable space and to see their property value climb. Yet, the process is often fraught with anxiety, primarily centered on the budget. You’ve heard the advice: get multiple quotes, plan carefully, and set aside a contingency fund. But this is where most guidance stops, leaving you vulnerable to the most common pitfalls.
The reality is that most renovations go over budget not because of a single catastrophic event, but due to a thousand small, unmanaged decisions and a failure to control the project’s timeline. The generic advice ignores the operational discipline that separates a successful investment from a financial drain. It’s less about the paint colors you choose and more about the systems you enforce.
This guide takes a different approach. Forget the platitudes. We will dive into the pragmatic, experience-driven strategies that contractors and real estate investors use to protect their profits. The secret doesn’t lie in finding the cheapest materials or doing all the work yourself. It lies in understanding the hidden forces that cause budgets to swell and timelines to break. It’s about preventing “value erosion” at every step, from preserving architectural integrity to calculating the true lifecycle cost of your materials.
By mastering these core systems—budget discipline, scheduling logic, and strategic material selection—you can navigate your renovation with the confidence of a pro, ensuring the final result not only enhances your life but also delivers a significant return on investment.
This article breaks down the essential systems and critical mistakes to avoid in your home renovation. The following sections will provide a clear roadmap to help you manage your project for maximum value and efficiency.
Contents: A Contractor’s Guide to a Profitable Renovation
- Why Your Renovation Budget Will Likely Overshoot by 20%?
- How to Schedule Contractors to Avoid Downtime and Delays?
- DIY vs Pro: Which Tasks Are Safe to Do Yourself to Save Money?
- The Load-Bearing Wall Mistake That Can Collapse Your Renovation Project
- How to Retrofit Insulation During a Renovation for Maximum ROI?
- Why Removing Original Crown Molding Devalues Your Historic Property?
- Why “Recyclable” Materials Are Not Always the Most Eco-Friendly Choice?
- Choosing Sustainable Materials: Which Flooring Options Offer the Best Durability for High-Traffic Areas?
Why Your Renovation Budget Will Likely Overshoot by 20%?
The most common fear in any renovation is the budget spiraling out of control. It’s a well-founded concern; nearly 40% of homeowners exceeded their renovation budget in 2023. The common culprit isn’t just one unexpected issue behind a wall. The primary driver of cost overruns is “scope creep”—a slow cascade of changes, additions, and “upgrades” made after the project has already started. Every “while we’re at it” decision adds not only material cost but also labor hours and potential delays.
Experienced investors understand this and combat it with a system of rigid decision lock-in. This isn’t about being inflexible; it’s about being disciplined. A study from Harvard’s Joint Center for Housing Studies found that projects with multiple mid-stream changes averaged 35% over their initial budgets, largely due to these “change order cascades.” The goal is to front-load all your decisions into the planning phase, treating the signed contract and scope of work as final.
Your contingency fund, typically 15-20% of the total budget, should be treated as a locked box, accessible only for true unforeseen problems—like discovering mold or faulty wiring—not for changing your mind on tile selection. By defining every material, fixture, and finish with exact SKUs and prices beforehand, you remove the temptation to make expensive on-the-fly adjustments. This discipline is the single most effective tool for keeping your budget on track.
How to Schedule Contractors to Avoid Downtime and Delays?
A broken schedule is a broken budget. Unproductive downtime, where one trade has to wait for another to finish, is a silent profit killer. This “operational drag” costs you money in extended labor, project management fees, and the simple cost of living in a construction zone longer. Efficient scheduling isn’t about rushing; it’s about understanding the logical sequence of work and the critical dependencies between trades.
The key is using a Critical Path Method, which maps out the essential sequence of tasks that determine the project’s total duration. For example, drywall cannot start until the electrical and plumbing rough-ins are complete and have passed inspection. Flooring can’t go down until the drywall is finished and painted to avoid damage. A delay in one critical task creates a domino effect, pushing back every subsequent trade.

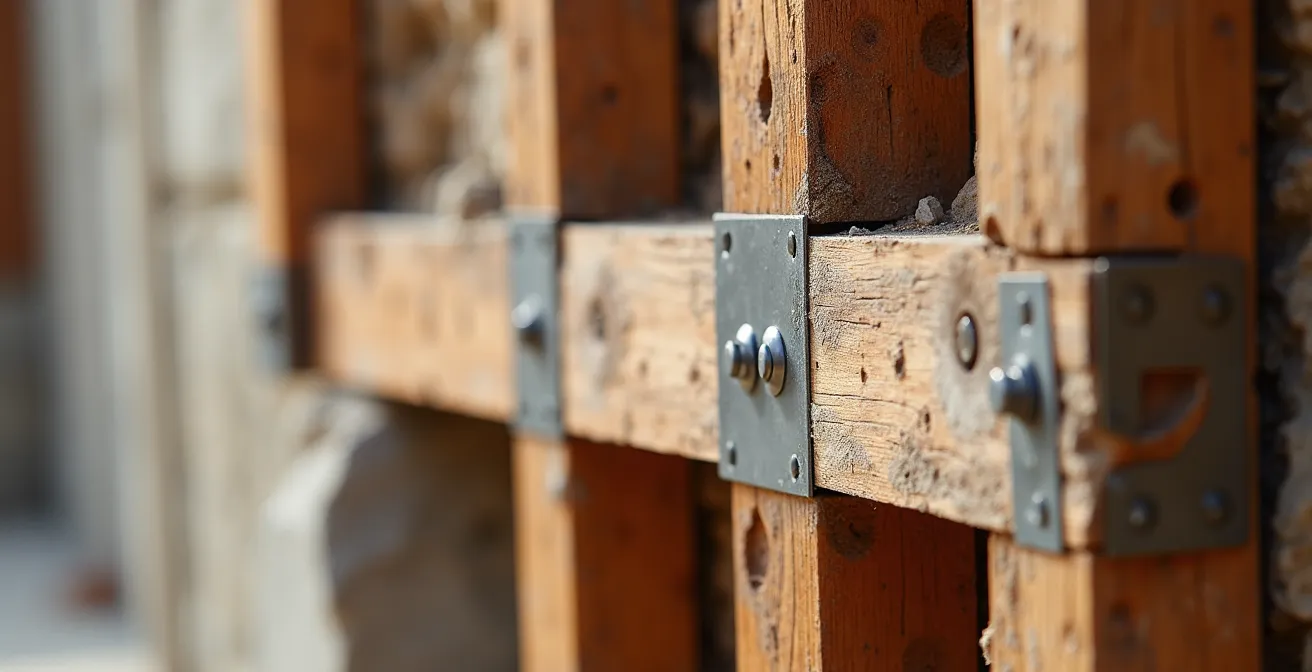
As the visual above suggests, construction is a linear flow. You must work with your general contractor to create a detailed schedule that not only lists each trade’s start and end dates but also includes “buffer days.” These are planned, empty days between major trades that account for small delays, like a material delivery being late or a task taking a day longer than expected. Without these buffers, one small hiccup can derail the entire timeline.
The following table illustrates the typical dependencies and realistic timeframes for major renovation stages. A professional contractor manages this flow meticulously.
| Trade | Dependencies | Typical Duration | Buffer Days |
|---|---|---|---|
| Framing | Foundation complete | 5-7 days | 2 |
| Electrical Rough-in | Framing complete | 3-4 days | 1 |
| Plumbing Rough-in | Framing complete | 3-4 days | 1 |
| Insulation | Electrical/Plumbing inspected | 2 days | 1 |
| Drywall | Insulation complete | 5-7 days | 2 |
| Flooring | Drywall painted | 3-5 days | 1 |
DIY vs Pro: Which Tasks Are Safe to Do Yourself to Save Money?
The temptation to save money through “sweat equity” is powerful. However, a failed DIY attempt can cost far more to fix than hiring a professional from the start. The decision isn’t simply about whether you *can* do a task, but whether you *should*. While data shows that 91% of homeowners hire professionals for remodeling projects, a hybrid approach often yields the best ROI. The key is to identify low-risk, high-labor tasks that don’t require specialized licenses or risk catastrophic failure.
Safe and effective DIY tasks typically include:
- Demolition: Carefully tearing out non-structural elements like old cabinets, flooring, or drywall.
- Painting: A time-consuming task that offers significant savings on labor.
- Landscaping and cleanup: Daily site cleanup and basic yard work.
- Installing simple fixtures: Swapping out light fixtures (with the power off) or cabinet hardware.
On the other hand, tasks involving plumbing, electrical, gas lines, or any structural work should be left to licensed professionals. The risk of leaks, fires, or structural damage—not to mention failing a home inspection—far outweighs any potential savings.
Case Study: Pro-Assisted DIY Success
A homeowner looking to renovate their kitchen strategically split the workload. They handled the demolition of old cabinets and countertops, and took on all the final painting themselves. By hiring licensed professionals for the critical plumbing and electrical work, they ensured safety and code compliance. This hybrid approach saved them an estimated $15,000 on the project. They spent 80 hours on their DIY tasks, effectively “paying themselves” over $187 per hour compared to the cost of full professional services.
Before taking on a task, honestly calculate your “true hourly worth” (your annual salary divided by 2,080 working hours) and compare it to the cost of a professional. If you can earn more at your job in the time it would take you to learn and complete a DIY task, it’s often more cost-effective to hire it out.
The Load-Bearing Wall Mistake That Can Collapse Your Renovation Project
The dream of an open-concept living space often involves removing a wall. This is one of the most dangerous assumptions a homeowner can make without professional consultation. Mistaking a load-bearing wall for a simple partition can lead to severe structural damage, threatening the integrity of your entire home. A load-bearing wall is an active structural element, transferring weight from the roof and upper floors down to the foundation.
Identifying a load-bearing wall requires a trained eye. Clues include walls running perpendicular to the floor joists above, walls located centrally over a crawlspace or basement support beam, or walls that are continuous through multiple floors. However, these are just indicators. The only way to be certain is to have a structural engineer or an experienced contractor make the determination. Never, under any circumstances, should you remove a wall based on a guess.
Removing a load-bearing wall requires installing a properly sized beam or header to carry the load, with support posts transferring that weight to the foundation. An undersized beam or inadequate support can cause slow, progressive failure. As one expert warns, the consequences aren’t always immediate and dramatic.
Improper removal doesn’t always lead to catastrophic failure, but to gradual, value-destroying problems like sagging floors and ceiling cracks that will be flagged during future home inspections.
– Anthony Perera, Family Handyman Home Renovation Guide
This is a classic example of value erosion. The money saved by not hiring an engineer is lost tenfold when a future buyer’s inspection report reveals structural issues, leading to costly repairs or a significantly lower sale price.
How to Retrofit Insulation During a Renovation for Maximum ROI?
While kitchens and bathrooms get all the attention, one of the highest-ROI improvements you can make during a renovation is often unseen: insulation. When your walls or ceilings are already open, adding or upgrading insulation is incredibly cost-effective. It directly impacts your home’s energy efficiency, lowering utility bills for years to come, which is a major selling point for future buyers. Furthermore, it significantly improves the comfort and soundproofing of the space.
The financial return is compelling. For certain upgrades, industry data confirms that adding attic insulation often recoups 100% of its cost in added home value upon resale. This makes it one of the few improvements that can essentially pay for itself. The key is to focus your investment where it will have the greatest impact.
The attic is the number one priority, as it’s where most heat loss occurs. After that, focusing on crawlspaces and rim joists provides the next best return. Insulating exterior walls is also beneficial, but the cost is significantly higher, leading to a longer payback period. The right choice depends on your climate zone and budget, but the principle remains: insulation is an investment, not just an expense.
This table breaks down the typical costs and returns for insulating different areas of your home, highlighting where you get the most value for your money.
| Location | Average Cost | Energy Savings/Year | ROI Period | Home Value Increase |
|---|---|---|---|---|
| Attic | $1,500-$3,000 | $600 | 3-5 years | 100% |
| Crawlspace/Rim Joists | $2,000-$4,000 | $400 | 5-7 years | 75% |
| Exterior Walls | $5,000-$15,000 | $300 | 10-15 years | 50% |
Why Removing Original Crown Molding Devalues Your Historic Property?
In the rush to modernize an older home, many renovators make a critical mistake: they strip away the very features that give the property its character and value. Original crown molding, baseboards, plasterwork, or built-ins are not just decorative elements; they represent the home’s architectural integrity. Removing them is a form of value erosion that can never be fully recovered. Buyers seeking historic homes are specifically looking for this character, and they will pay a premium for it.
A misguided attempt to create a “clean, modern look” by tearing out these details often backfires, resulting in a generic space that has lost its soul. This directly impacts the property’s appraisal value and market appeal.
Case Study: The Value of Architectural Integrity
A comparative market analysis of 50 historic homes revealed a stark difference in value. Properties where the original architectural details were preserved and restored sold for 15-20% more than similar properties where these period features had been removed. Appraisers involved in the study specifically cited “architectural integrity” as a key driver of value in their final assessments, confirming that originality is a quantifiable asset.
The smarter approach is not to remove, but to integrate. You can create a stunning, contemporary feel while respecting the home’s history. The key is to create contrast and balance between old and new. Rather than fighting against the home’s original character, use it as a sophisticated backdrop for modern living.
Action Plan: Audit for Integrating Modern Design with Historic Details
- Unify with Color: Paint walls, trim, and even the ceiling in the same sophisticated, modern color to create a seamless, monochromatic look that makes the molding’s texture stand out.
- Highlight with Light: Install modern LED strip lighting discreetly along the top of crown molding to wash the ceiling with light, highlighting the shadows and creating a dramatic, contemporary effect.
- Contrast with Furniture: Juxtapose ornate, traditional details with minimalist, clean-lined modern furniture. This visual tension creates a powerful and balanced design statement.
- Juxtapose with Art: Use bold, large-scale contemporary art as a focal point against a wall with traditional molding. The contrast between the classic frame and modern content is striking.
- Update with Finish: For a daring twist, consider applying a high-gloss or even a metallic finish to the molding itself, transforming it from a traditional element into a modern sculptural feature.
Why “Recyclable” Materials Are Not Always the Most Eco-Friendly Choice?
In today’s market, “eco-friendly” has become a powerful buzzword. Many homeowners gravitate towards materials labeled as “recyclable,” assuming they are making the most sustainable choice. However, a professional investor looks beyond the label to the material’s entire lifecycle cost. This includes its durability, maintenance requirements, and expected lifespan. A material’s end-of-life recyclability is only one small part of its environmental impact.
The most sustainable choice is often the material you don’t have to replace. Manufacturing, shipping, and installing new materials—even recycled ones—consumes significant energy and resources. A durable material that lasts for decades eliminates multiple cycles of replacement, making it far more environmentally friendly in the long run than a less durable, “recyclable” product that ends up in a landfill (or recycling facility) every 10 years.
A material that lasts 50 years and avoids multiple replacement cycles is more sustainable than a ‘recyclable’ one that fails in 10, regardless of its end-of-life potential.
– Harvard Joint Center for Housing Studies, Sustainable Building Materials Report
This mindset shifts the focus from disposability to longevity. Think of solid hardwood floors that can be refinished multiple times over a century, slate roofing that can last 150 years, or copper plumbing that endures for generations. These materials embody true sustainability. Their upfront cost may be higher, but their extended lifespan and low replacement frequency result in a lower total cost of ownership and a smaller long-term environmental footprint.
Key Takeaways
- System Over Spontaneity: A successful renovation relies on rigid systems for budget, scheduling, and decision-making, not on-the-fly creativity.
- Value Is in the Details: True property value is protected by preserving architectural integrity and making unseen upgrades like insulation, not just by cosmetic changes.
- Think in Lifecycles, Not Price Tags: The most cost-effective and sustainable materials are those that offer the greatest durability and longevity, reducing long-term replacement costs.
Choosing Sustainable Materials: Which Flooring Options Offer the Best Durability for High-Traffic Areas?
Nowhere is the concept of lifecycle cost more apparent than in flooring. As one of the most heavily used surfaces in a home, flooring in high-traffic areas like hallways, kitchens, and living rooms must be chosen for durability first and foremost. A cheap flooring material that looks great on day one but scratches, dents, or wears out in a few years is a poor investment. It will require premature replacement, erasing any initial savings and adding to landfill waste.
When evaluating flooring, savvy investors look at the 75-year total cost. This calculation includes the initial purchase and installation, periodic maintenance (like refinishing), and the cost of full replacement cycles over a typical home’s lifespan. Materials like Luxury Vinyl Plank (LVP) may have a low upfront cost, but their limited lifespan and inability to be repaired mean they will be replaced multiple times, driving up the long-term expense.
In contrast, materials like solid hardwood or high-quality porcelain tile have a higher initial cost but exceptional durability. Hardwood can be sanded and refinished 5-7 times, giving it a potential lifespan of over 75 years. This longevity makes its total lifecycle cost surprisingly low. In fact, recent market analysis shows that homeowners who refinished existing wood floors recouped their entire investment plus an extra 47% in home value.
The following table provides a clear comparison of common flooring materials, analyzing their long-term financial viability rather than just their upfront price tag.
| Material | Initial Cost/sq ft | Lifespan | Refinish Potential | 75-Year Total Cost |
|---|---|---|---|---|
| Solid Hardwood | $8-15 | 75+ years | 5-7 times | $15-20 |
| Luxury Vinyl Plank | $4-8 | 10-20 years | None – Replace | $20-40 |
| Porcelain Tile | $5-12 | 50+ years | Regrout only | $8-18 |
| Marmoleum | $6-10 | 30-40 years | Surface renewal | $12-25 |
Applying this systematic, value-driven approach to every decision in your renovation is the ultimate path to success. By focusing on durable materials, sound scheduling, and strict budget discipline, you transform a potentially stressful expense into a profitable, long-term investment.