The secret to a successful zero-waste kitchen isn’t buying new eco-gadgets, but mindfully correcting the hidden mistakes we make with the items we already own.
- Your plastic cutting board and containers likely shed millions of microplastics into your food, especially when heated.
- Common practices like bulk buying and fridge storage can actually increase waste if not managed with simple, effective systems.
Recommendation: Start by using up what you have and focus on one system at a time—like fridge organization or a “transition box”—to build sustainable habits without the stress.
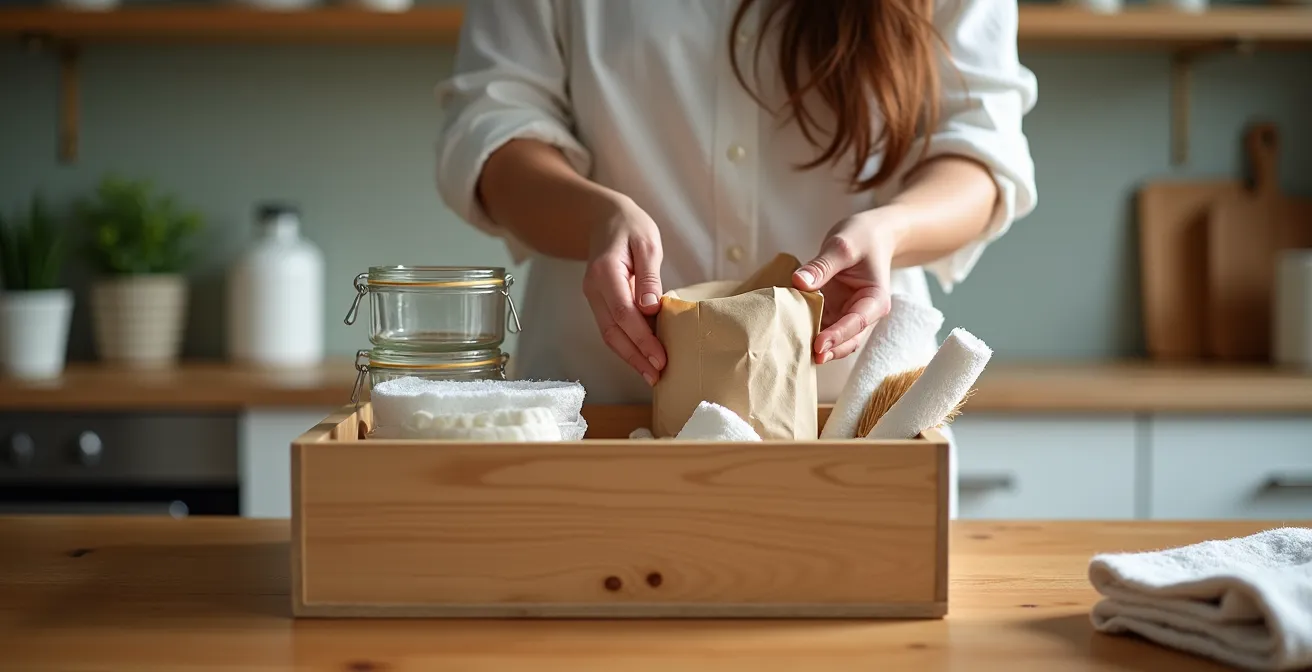
The vision of a zero-waste kitchen is beautiful: gleaming glass jars, fresh produce without a hint of plastic, and a sense of harmony with the planet. But for most of us, the reality is a drawer overflowing with plastic containers, a fridge full of clamshells, and a feeling of being completely overwhelmed. Where do you even begin? The internet shouts a hundred different rules: buy in bulk, get beeswax wraps, switch to bamboo everything! This pressure to achieve eco-perfection overnight is the number one reason most people give up.
But what if the path to a low-waste lifestyle wasn’t about a radical, expensive overhaul? What if it was about understanding the subtle, everyday mistakes that perpetuate our reliance on plastic and lead to food waste? The true power lies not in chasing every new sustainable product, but in developing a new awareness. It’s about a mindful transition, recognizing the hidden costs of our current habits—to our health, our wallets, and the environment.
This guide is designed to relieve the pressure, not add to it. We will move beyond the generic advice and focus on the common, often counter-intuitive pitfalls that home cooks face. By tackling these issues with practical, inspiring systems, you’ll learn to make informed choices that build a truly sustainable kitchen, one intentional step at a time.
This article breaks down the essential shifts in mindset and practice needed to transform your kitchen. We’ll explore everything from the invisible plastics in your diet to the organizational tricks that save both food and money, providing a clear roadmap for your zero-waste journey.
Summary: Your Guide to a Practical, Plastic-Free Kitchen
- Why Your Plastic Cutting Board Is Adding Plastic to Your Diet?
- How to Make Effective Dish Soap from Scraps and Vinegar?
- Glass vs Silicone: Which Freezer Storage Lasts Longer?
- The “Bulk Bin” Mistake That Leads to Pantry Moths and Waste
- When to Swap: Using Up Old Products Before Buying Eco-Friendly Versions
- The Plastic Container Mistake That Messes with Your Hormones
- The Fridge Organization Mistake That Costs You $50 a Month in Spoiled Food
- Waste Reduction and Circular Economy: How to Turn Household Trash into Savings?
Why Your Plastic Cutting Board Is Adding Plastic to Your Diet?
That trusty plastic cutting board, a seemingly innocent kitchen staple, might be one of the most significant sources of plastic in your diet. Every time your knife slices across its surface, it’s not just chopping vegetables; it’s shearing off microscopic fragments that cling to your food. This isn’t a theoretical risk; it’s a measurable reality. The grooves and scars on a well-used board are evidence of material being worn away and ending up somewhere—often, in your meals.
The scale of this issue is startling. According to a 2023 study in Environmental Science & Technology, the simple act of chopping food on plastic boards can result in a personal exposure of 14.5 to 79.4 million microplastic particles annually. The research team at North Dakota State University demonstrated this by chopping carrots on plastic boards, finding that microplastics were readily transferred to the food. Their analysis suggests that even a single knife stroke can release hundreds of particles, creating a constant, low-dose exposure to polymers like polyethylene and polypropylene.
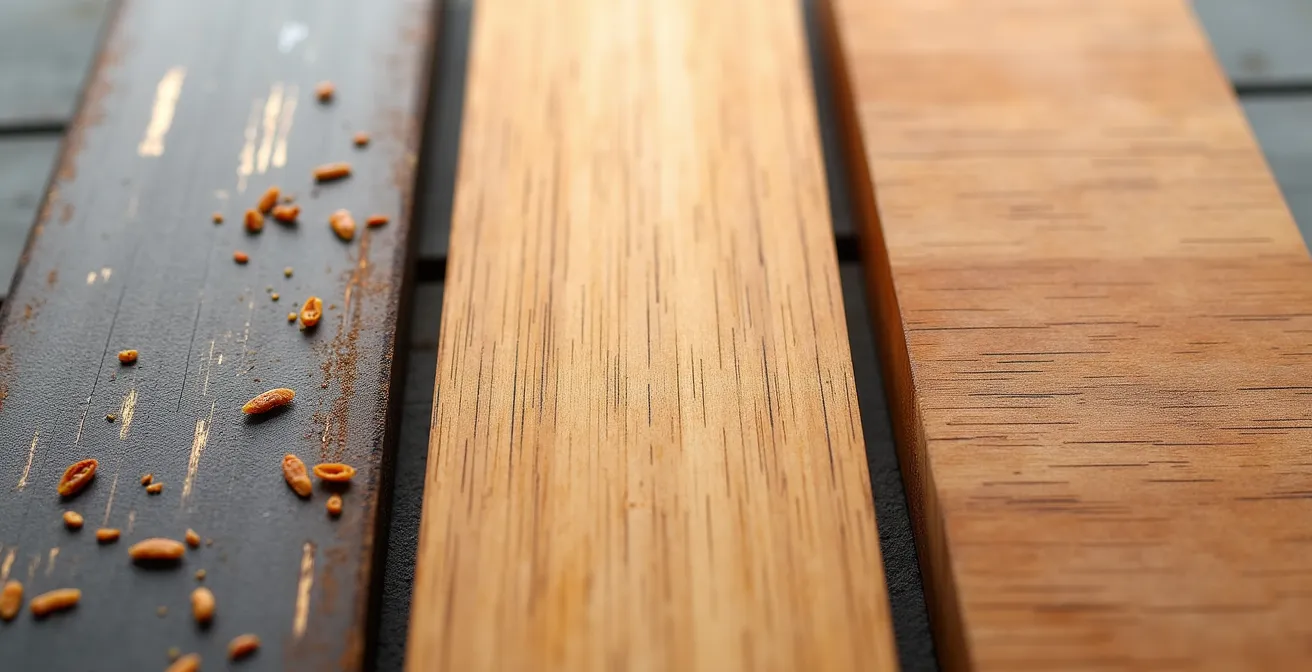
As the image above illustrates, the difference in material integrity is stark. While wood and bamboo show fine, clean marks, plastic degrades into a rough, pitted surface that not only releases particles but can also harbor bacteria more easily. Making the switch to a solid hardwood (like maple) or a high-quality bamboo board is a powerful first step in reducing this hidden ingestion of plastic. These materials are not only more durable but can also be periodically sanded and refinished, extending their life indefinitely.
How to Make Effective Dish Soap from Scraps and Vinegar?
Embracing a zero-waste kitchen often feels like a journey of replacement, but its true spirit lies in resourcefulness. Before you even think about buying a fancy soap block, look at your compost bin. Those citrus peels and other scraps hold the power to create a simple, effective, and virtually free cleaning solution. Making your own dish soap isn’t about replicating the sudsy foam of commercial detergents; it’s about creating a product that handles 80% of your daily cleaning needs with zero waste.
The foundation of this approach is a simple citrus-infused vinegar. By steeping lemon, orange, or grapefruit peels in white vinegar for a couple of weeks, you create a powerful degreasing agent with a fresh, natural scent. This alone can tackle light cleaning tasks. For added cleaning power, especially for plates with more than just a bit of residue, incorporating natural saponins from soap nuts and the grease-cutting ability of washing soda elevates your homemade solution from a simple cleaner to a proper dish soap.
While this DIY mixture excels at cleaning glasses, plates, and cutlery with light grease, it’s important to be realistic. It won’t have the power to cut through the heavy, baked-on oils from a roasting pan as effectively as a concentrated commercial soap. The beauty of this system is not replacing everything, but drastically reducing your reliance on plastic bottles for the vast majority of your washing. Keep a small, eco-friendly bottle of concentrate for the toughest jobs, and use your homemade soap for everything else. You’ll be amazed at how long that single bottle lasts.
- Collect & Infuse: Gather citrus peels in a glass jar. Cover them with white vinegar and let them infuse in a dark place for at least two weeks. This creates your acidic, scented cleaning base.
- Extract Saponins: For extra cleaning power, soak a handful of soap nuts (about 10-15) in a cup of warm water for 30 minutes. The water will turn cloudy as it extracts the natural soap. Strain the liquid.
- Combine & Boost: In a reused bottle, mix one part citrus vinegar with one part soap nut liquid. For every two cups of liquid, add about a tablespoon of washing soda to help cut through grease.
- Stabilize & Store: Add a teaspoon of vegetable glycerin if you have it; this helps keep the mixture from separating. Shake well before each use.
Glass vs Silicone: Which Freezer Storage Lasts Longer?
The freezer is a zero-waste warrior’s best friend, locking in nutrients and preventing food from spoiling. But choosing the right container is key to avoiding both plastic and waste. The two main plastic-free contenders, glass and silicone, are often seen as interchangeable, but they have distinct strengths. An informed choice between them is crucial for long-term food preservation, space management, and ultimate usability. It’s not about which is “better,” but which is right for the specific job.
Glass is the undisputed champion for purity and long-term storage. Being non-porous and infinitely recyclable, it’s perfect for liquids like soups, stocks, and sauces, as it won’t stain or absorb odors. Its key advantage is thermal stability; many borosilicate glass containers can go directly from the freezer to the oven, streamlining the process of reheating leftovers. The main rule with glass is to always leave at least an inch of headspace to allow for liquid expansion, preventing cracks.
Silicone, on the other hand, offers unparalleled flexibility and space-saving benefits. It’s the ideal choice for portioning—think freezing single servings of baby food, herb-infused olive oil in ice cube trays, or smoothie packs. Its pliable nature makes it easy to pop frozen items out. Furthermore, collapsible silicone bags are a game-changer for small freezers and on-the-go lunches, as they won’t shatter if dropped and take up minimal space when empty. Choosing high-quality, platinum-grade silicone ensures it’s food-safe and durable for years of use.
- Use Glass For: Liquids like soups and broths (leave headspace), long-term storage of leftovers (6+ months), and items you plan to reheat directly in the oven.
- Use Silicone For: Portioning small items like baby food or pesto, on-the-go meals where breakage is a concern, and maximizing space with collapsible bags or stackable trays.
The “Bulk Bin” Mistake That Leads to Pantry Moths and Waste
Walking into a store lined with bulk bins feels like a zero-waste victory. You can finally buy rice, nuts, and flour without a single piece of plastic packaging. However, this is where a common and costly mistake occurs: the “all-you-can-buy” mentality. Without a proper system, those beautiful glass jars can become a breeding ground for pantry moths or lead to forgotten foods that expire, negating the sustainable effort entirely. The key isn’t just buying in bulk; it’s managing inventory like a professional kitchen.
Pantry pests are often brought into the home *from* the bulk bins themselves. A simple but critical step is to quarantine certain items. Flour, nuts, and grains should be placed in the freezer for at least 72 hours upon arriving home to kill any potential eggs. After this “deep freeze,” they can be moved to airtight glass jars for long-term storage. Adding a bay leaf to jars of beans or grains is also a classic, natural pest deterrent.
Case Study: The “Eat Me First” Box
Inspired by restaurant inventory management, the “Eat Me First” box is a simple and powerful system. Designate a specific, highly visible container or shelf in your pantry and fridge. Any item that is approaching its expiration date, any half-used bag of chips, or any produce that needs to be used soon goes into this box. It creates a visual cue for the whole household: before opening something new, check the box. This single habit dramatically reduces the chance of finding expired or stale food hidden in the back of the cupboard.
Beyond pest control, smart purchasing is essential. Not everything is a good candidate for a 10-pound bag. Spices lose their potency, and oils in nuts and seeds can go rancid. A system of informed buying, combined with proper storage, is the only way to make bulk bins a true asset in your zero-waste journey.
| Item Category | Bulk Buy Threshold | Storage Method | Typical Shelf Life |
|---|---|---|---|
| Rice, pasta | 5-10 lbs | Airtight glass jars | 2+ years |
| Nuts, seeds | 1-2 lbs | Freezer after 72hr quarantine | 6-12 months frozen |
| Flour | 5 lbs max | Freezer 72hrs, then airtight container | 8 months |
| Spices | 2-4 oz only | Small dark jars | 1-3 years |
| Dried beans | 2-5 lbs | Glass jars with bay leaves | 2-3 years |
When to Swap: Using Up Old Products Before Buying Eco-Friendly Versions
In the excitement of starting a zero-waste journey, it’s tempting to purge your kitchen of all plastic and rush out to buy a beautiful new set of sustainable alternatives. This is, ironically, one of the most wasteful things you can do. The true first principle of a low-impact lifestyle is to honor the resources that have already been consumed. A half-used bottle of dish soap or a roll of plastic wrap already exists. Throwing it away to replace it with a “greener” option wastes the energy, water, and materials used to create it.
This philosophy is perfectly captured by a leading voice in the movement. As Anne Marie Bonneau, the Zero-Waste Chef, famously states:
The most sustainable choice is to use what you already have until it’s completely worn out.
– Anne Marie Bonneau, Zero-Waste Chef
This “use it up” mentality is the cornerstone of a mindful transition. It prevents waste, saves money, and turns the process from a stressful overhaul into a gradual, rewarding journey. The key is to create a system that facilitates this transition gracefully. Instead of a purge, think of it as a planned succession. As you identify a sustainable swap you’d like to make, buy the new item but don’t use it yet. This is where the “Transition Box” system comes in.
Your Action Plan: Creating a “Transition Box” System
- Designate a Space: Find a box, a drawer, or a dedicated shelf. This will be your personal “shop” for sustainable swaps you’ve purchased in advance.
- Label for a Purpose: When you add a new eco-friendly item (e.g., a set of beeswax wraps), label it with what it’s intended to replace (e.g., “Replaces Plastic Wrap”). This creates a clear intention.
- Shop Your Home First: The rule is simple: you can only “shop” from your transition box once the conventional item it replaces is completely used up, broken, or finished.
- Celebrate the Swap: Each time you make a switch, acknowledge it as a victory. This positive reinforcement turns the transition into a series of satisfying milestones rather than a chore.
- Organize a Swap or Donation: If you have partially-used items you know you won’t finish (like a sauce you dislike), don’t throw them out. Organize a neighborhood food swap or donate them to a local shelter or community fridge.
The Plastic Container Mistake That Messes with Your Hormones
We’ve discussed the visible waste from plastics, but one of the most significant hidden costs is to our health. Many plastic containers, especially older, scratched, or disposable ones, contain chemical additives like BPA and phthalates. These are known endocrine disruptors, meaning they can interfere with the body’s hormonal systems. The single biggest mistake that accelerates this problem is heating them.
When you microwave food in a plastic container, the heat causes the plastic to break down and leach these chemicals directly into your meal at an accelerated rate. The same is true for pouring hot soup into a plastic storage bowl or running it through a high-heat dishwasher cycle. Even plastics marked “microwave-safe” are not immune; this label often just means the container won’t warp or melt. It does not guarantee that chemical leaching won’t occur. In fact, research shows that heating plastic containers can cause millions of microplastics and billions of nanoplastics to be released into your food.
Understanding the recycling codes on the bottom of containers can provide a quick guide to relative safety for *cold* storage, but the universal rule should be: never heat food in plastic. Always transfer food to a glass or ceramic dish before microwaving or reheating. While the goal is to phase out plastic for food storage entirely, knowing which plastics are the most problematic can help you prioritize your transition. Plastics with recycling codes #3 (PVC), #6 (PS), and #7 (Other, often polycarbonate) are generally considered the most hazardous and should be avoided for food contact whenever possible.
| Number | Type | Cold Storage | Hot Food/Microwave | Common Items |
|---|---|---|---|---|
| #1 PET | Polyethylene Terephthalate | Single use only | Never | Water bottles |
| #2 HDPE | High-Density Polyethylene | Relatively safe | Never | Milk jugs |
| #3 PVC | Polyvinyl Chloride | Avoid | Never | Cling wrap |
| #6 PS | Polystyrene | Avoid | Never | Takeout containers |
| #7 Other | Mixed/PC/PLA | Avoid unless PLA | Never | Mixed plastics |
The Fridge Organization Mistake That Costs You $50 a Month in Spoiled Food
A disorganized fridge isn’t just an aesthetic problem; it’s a financial drain and a major source of household food waste. When produce is stored incorrectly or forgotten in the back of a crowded shelf, it spoils. That wilted bunch of cilantro or fuzzy block of cheese is money being thrown directly into the compost bin. The mistake is treating the refrigerator like a generic cold box instead of a specialized preservation tool with different zones for different needs.
One of the biggest culprits is the misunderstanding of “best by” and “use by” dates. These labels are often indicators of peak quality, not food safety. In fact, research reveals that more than 80% of Americans discard perfectly good, safe-to-eat food simply because they misinterpret these dates. A well-organized fridge, combined with the “Eat Me First” box principle, encourages you to trust your senses—sight, smell, and taste—before throwing something out.
The most powerful organizational tool you have is your crisper drawers. They aren’t just extra bins; they are designed to control humidity, the single most important factor in extending the life of your produce. Most fridges have two drawers with adjustable slides. Setting one to high humidity (less airflow) and one to low humidity (more airflow) creates the perfect environment for different types of fruits and vegetables. This simple system can add days or even weeks to the life of your fresh food, saving you money and preventing waste.
- High Humidity Drawer (slide closed): This zone traps moisture. It’s perfect for things that wilt, like leafy greens, herbs, broccoli, and carrots. Wrapping them in a damp cloth or reusable silicone bag gives them an extra boost.
- Low Humidity Drawer (slide open): This zone allows ethylene gas—a natural ripening agent—to escape. It’s the right place for most fruits, peppers, and squash that tend to rot when they get too moist.
- Door and Top Shelves: These are the warmest parts of the fridge. Store less perishable items like condiments, jams, and drinks here.
- Countertop Heroes: Never refrigerate tomatoes, potatoes, onions, garlic, or whole bananas. Cold temperatures ruin their texture and flavor.
Key Takeaways
- The most significant sources of waste and plastic exposure are often hidden in everyday items like cutting boards and food containers.
- A successful zero-waste kitchen is built on effective systems (like fridge zones and pantry management), not just on acquiring new products.
- The most sustainable and least stressful approach is a mindful transition: use up what you have before replacing it with a better alternative.
Waste Reduction and Circular Economy: How to Turn Household Trash into Savings?
The final evolution in a zero-waste kitchen is a profound shift in perspective: you stop seeing “trash” and start seeing resources. This is the heart of a circular economy at home. Every vegetable scrap, coffee ground, and stale piece of bread is not an end point, but the beginning of a new product. This resourcefulness loop is where the journey becomes truly creative, rewarding, and economically savvy. It closes the loop on waste and transforms your kitchen into a miniature production hub.
The possibilities are endless and often surprisingly simple. That bag of vegetable scraps you’ve been collecting in the freezer? Simmer it with water and you have a rich, flavorful vegetable stock that’s better than anything from a carton. Stale bread can be cubed, seasoned, and toasted into croutons or blitzed into breadcrumbs. Used coffee grounds, mixed with a bit of coconut oil and sugar, become a luxurious and free body scrub.
Case Study: The Freezer Scrap Bag
A cornerstone of zero-waste cooking is the freezer scrap bag. Keep a large, reusable bag or container in your freezer. Throughout the week, toss in clean vegetable ends, peels, and stems: onion and garlic skins, carrot tops and peels, herb stems, mushroom stalks. Avoid cruciferous vegetables like broccoli or cabbage, as they can make the stock bitter. Once the bag is full, place the contents in a large pot, cover with water, and simmer for at least an hour. Strain the liquid, and you have free, homemade vegetable stock for soups and sauces. The spent scraps can then be composted.
This approach extends beyond just food. Citrus peels infused in vinegar create a powerful all-purpose cleaner. Banana peels can be used to fertilize houseplants. By systematically finding a secondary use for items you once threw away, you not only eliminate waste but also significantly reduce your spending on groceries and household products. This is the ultimate expression of a sustainable kitchen—a system that is beautiful, practical, and regenerative.
| Waste Item | Upcycle Method | End Product | Estimated Annual Savings |
|---|---|---|---|
| Citrus peels | Infuse in vinegar | All-purpose cleaner | $30-40 |
| Coffee grounds | Mix with coconut oil | Body scrub | $50-80 |
| Vegetable scraps | Freeze & simmer | Vegetable stock | $40-60 |
| Stale bread | Cube & season | Croutons/breadcrumbs | $25-35 |
| Banana peels | Marinate & fry | Vegan ‘bacon’ | $30-45 |
Start today. Pick one mistake from this guide that resonates with you—whether it’s organizing your fridge, quarantining your bulk-bin flour, or simply committing to never microwaving in plastic again. By focusing on one small, systematic change, you begin the mindful transition to a kitchen that is not only cleaner and healthier but also a true reflection of your values.